Homemade Chocolate Pudding
Rich, chocolaty, and oh-so-creamy, this homemade chocolate pudding is a must-make treat! Just as easy to make as boxed pudding, you’ll never want to go back to the store-bought stuff. This easy-to-follow pudding recipe is made with 6 simple ingredients and comes together in just 10 minutes (plus it’s egg-free!). An easy dessert for even a weeknight!

My first attempts at making homemade chocolate pudding used a custard (i.e. egg yolks) base. I cooked it for what seemed like eons, and it never got as thick as I thought it should have. However, I refrigerated it anyway, thinking that it might set up in the fridge. It never did, time after time.
When I returned to the drawing board, I noticed a pattern when researching chocolate pudding recipes – newer recipes all seemed to start with a custard egg base, while the older recipes all used cornstarch as the sole thickening agent. I’m a pretty traditional gal by nature, so I thought the cornstarch route might serve me well. Not surprisingly, it worked beautifully.
Why Make Your Own
You know I love making homemade versions of store-bought classics. From Oreos to Twinkies, I’ve made it all! When it comes to homemade pudding, it’s more than just the satisfaction of making it from scratch; it truly is better.
Here are a few more reasons if you need a gentle nudge:
- No additives or preservatives: You know exactly what you put into your pudding, so you don’t have to question what ingredients are on the back of the box.
- Same cook time: It takes about 10 minutes from start to finish, which isn’t much more than it would take to make the boxed stuff.
- Not limited to flavors on the shelf: Once you’ve mastered the art of making a pudding base you can easily whip up any flavor you want.
The Key Ingredients
As long as you keep milk in your fridge and chocolate in your pantry, you probably already have the ingredients for this wonderful pudding! Below are a few ingredient notes, but as always, check the recipe card for a full list of ingredients and quantities.
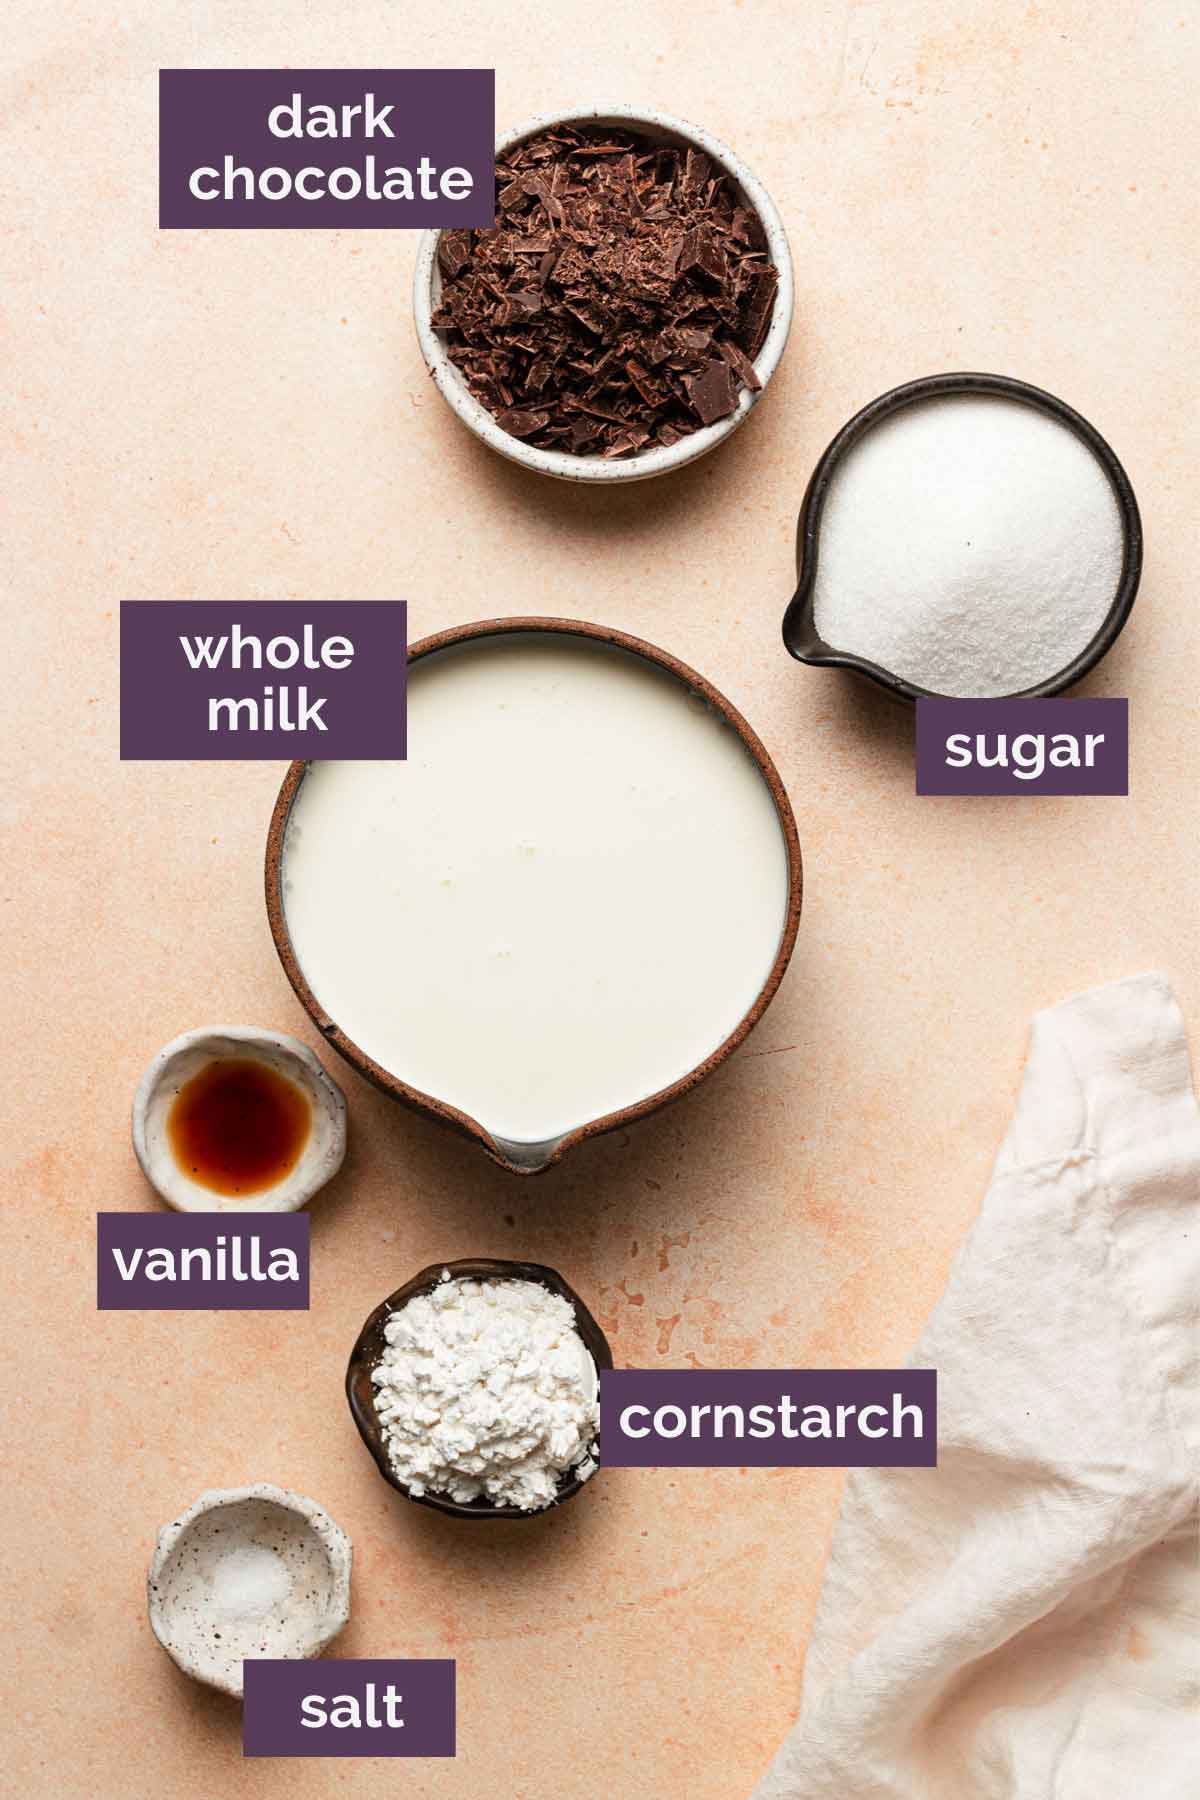
- Milk: You can use whole milk or half-and-half to make this pudding creamy and thick. I do not recommend using skim milk, 1% or 2% milk; the pudding may not set up properly.
- Bittersweet Chocolate: Gives the pudding a rich flavor without making it overly sweet. I typically use chocolate that’s 60% cacao. If you prefer a sweeter flavor, you can substitute semisweet chocolate.
- Cornstarch: Used to thicken the pudding to a creamy consistency; you can substitute arrowroot powder.
How to Make It
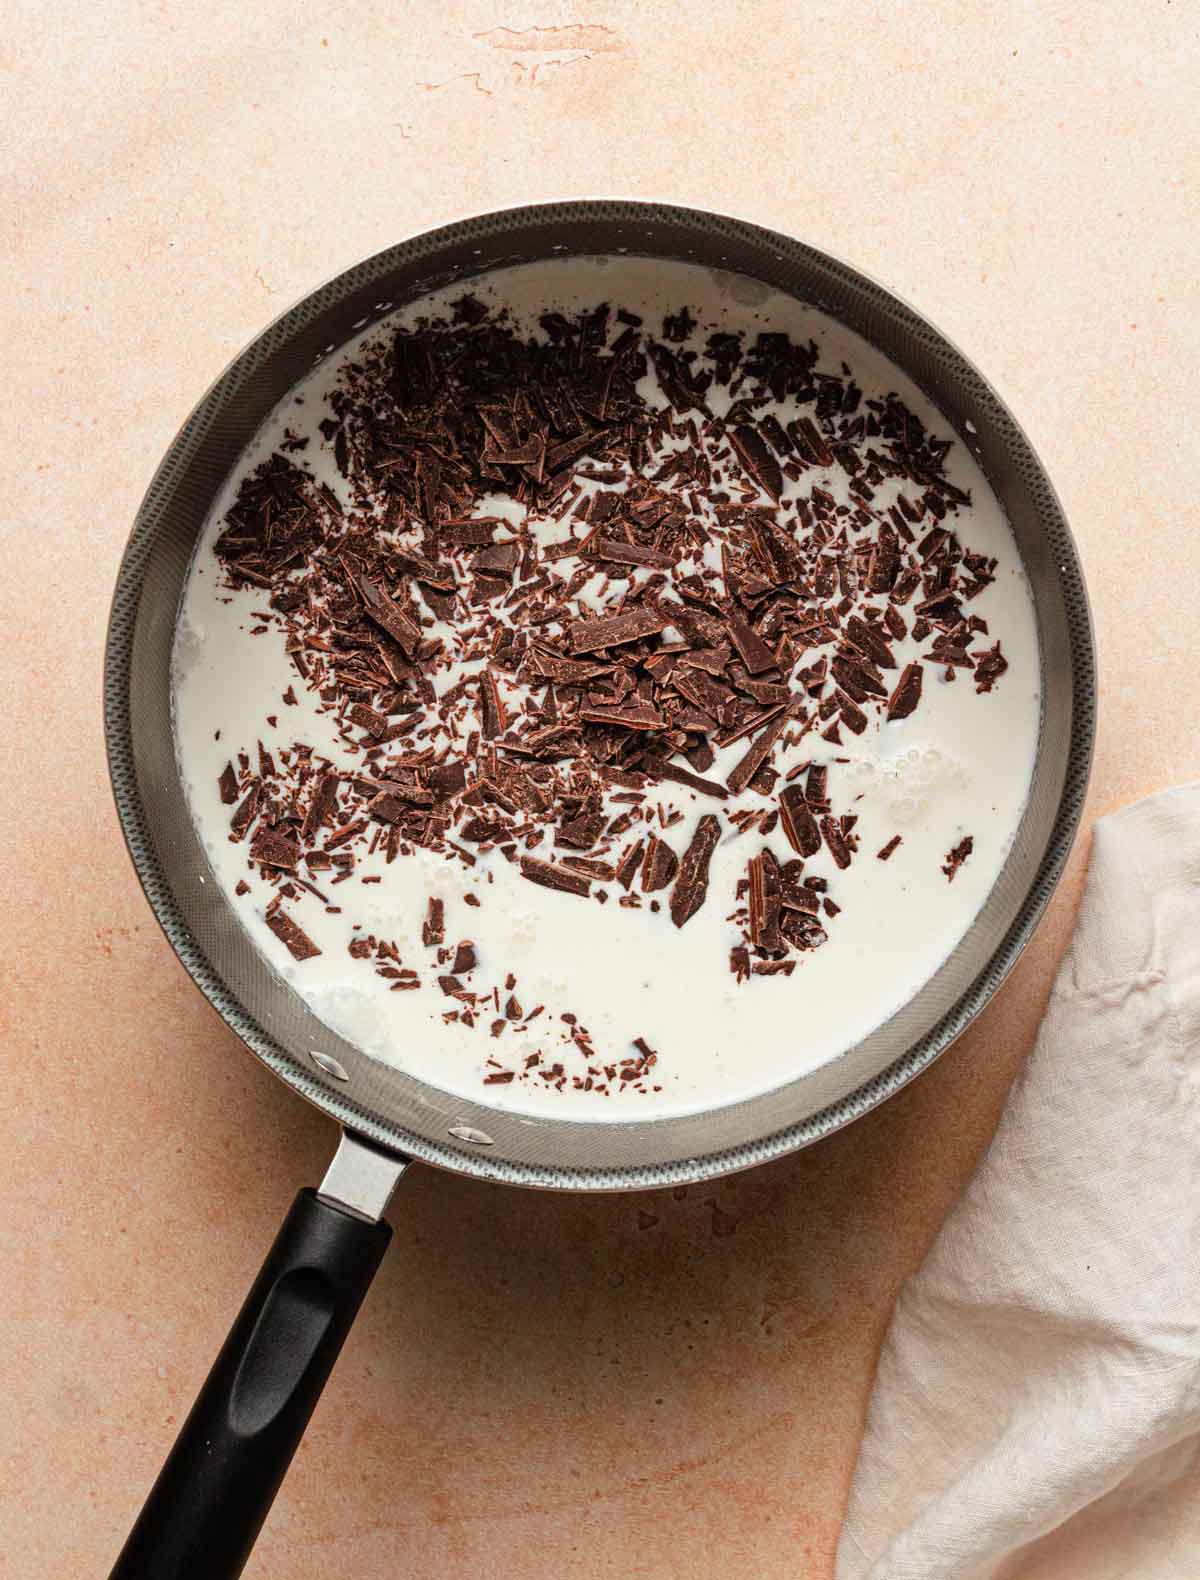
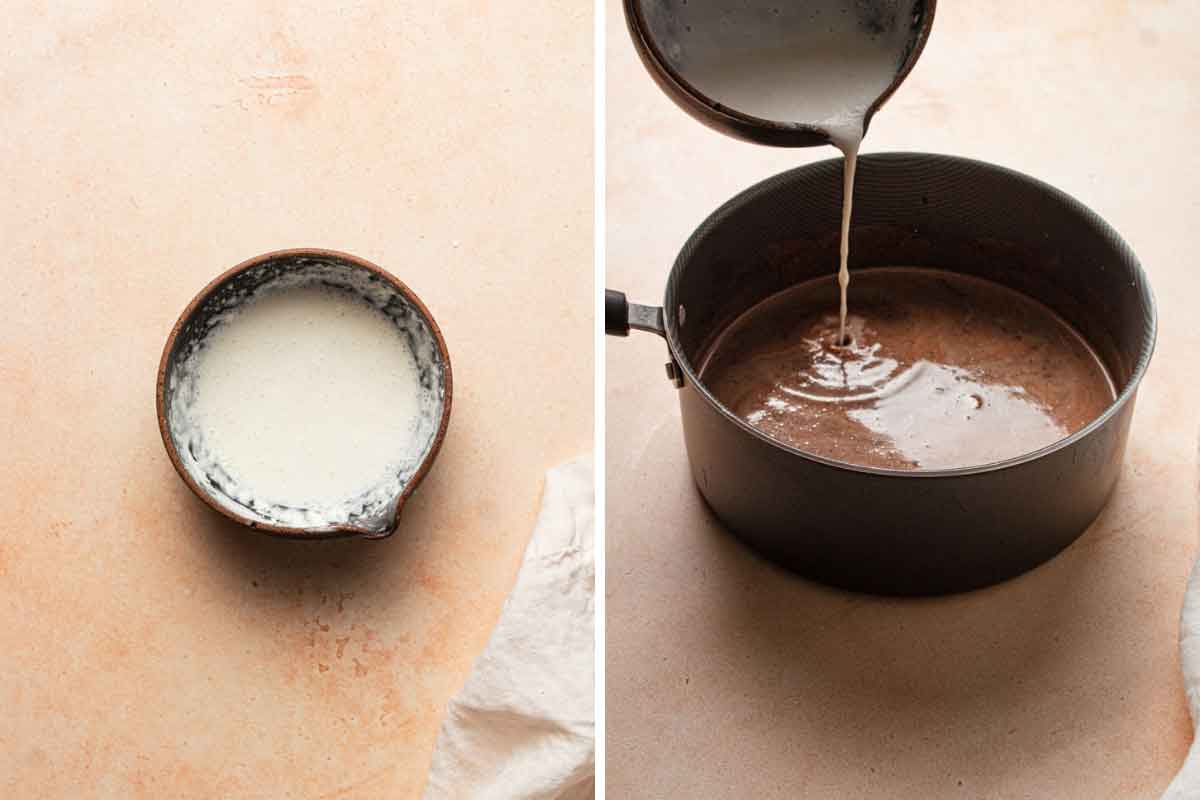
Step #1: Melt the Chocolate Mixture – Cook sugar, chocolate, salt, and most of the milk in a saucepan over medium-low heat until the chocolate is completely melted.
Step #2: Add The Cornstarch Slurry and Cook – In a small bowl, whisk together the remaining milk and cornstarch until no lumps remain. Pour the cornstarch mixture into the saucepan and whisk to combine. Cook, stirring frequently until the mixture thickens and begins to boil, then reduce heat to low and cook for an additional minute. Remove from heat and whisk in vanilla.
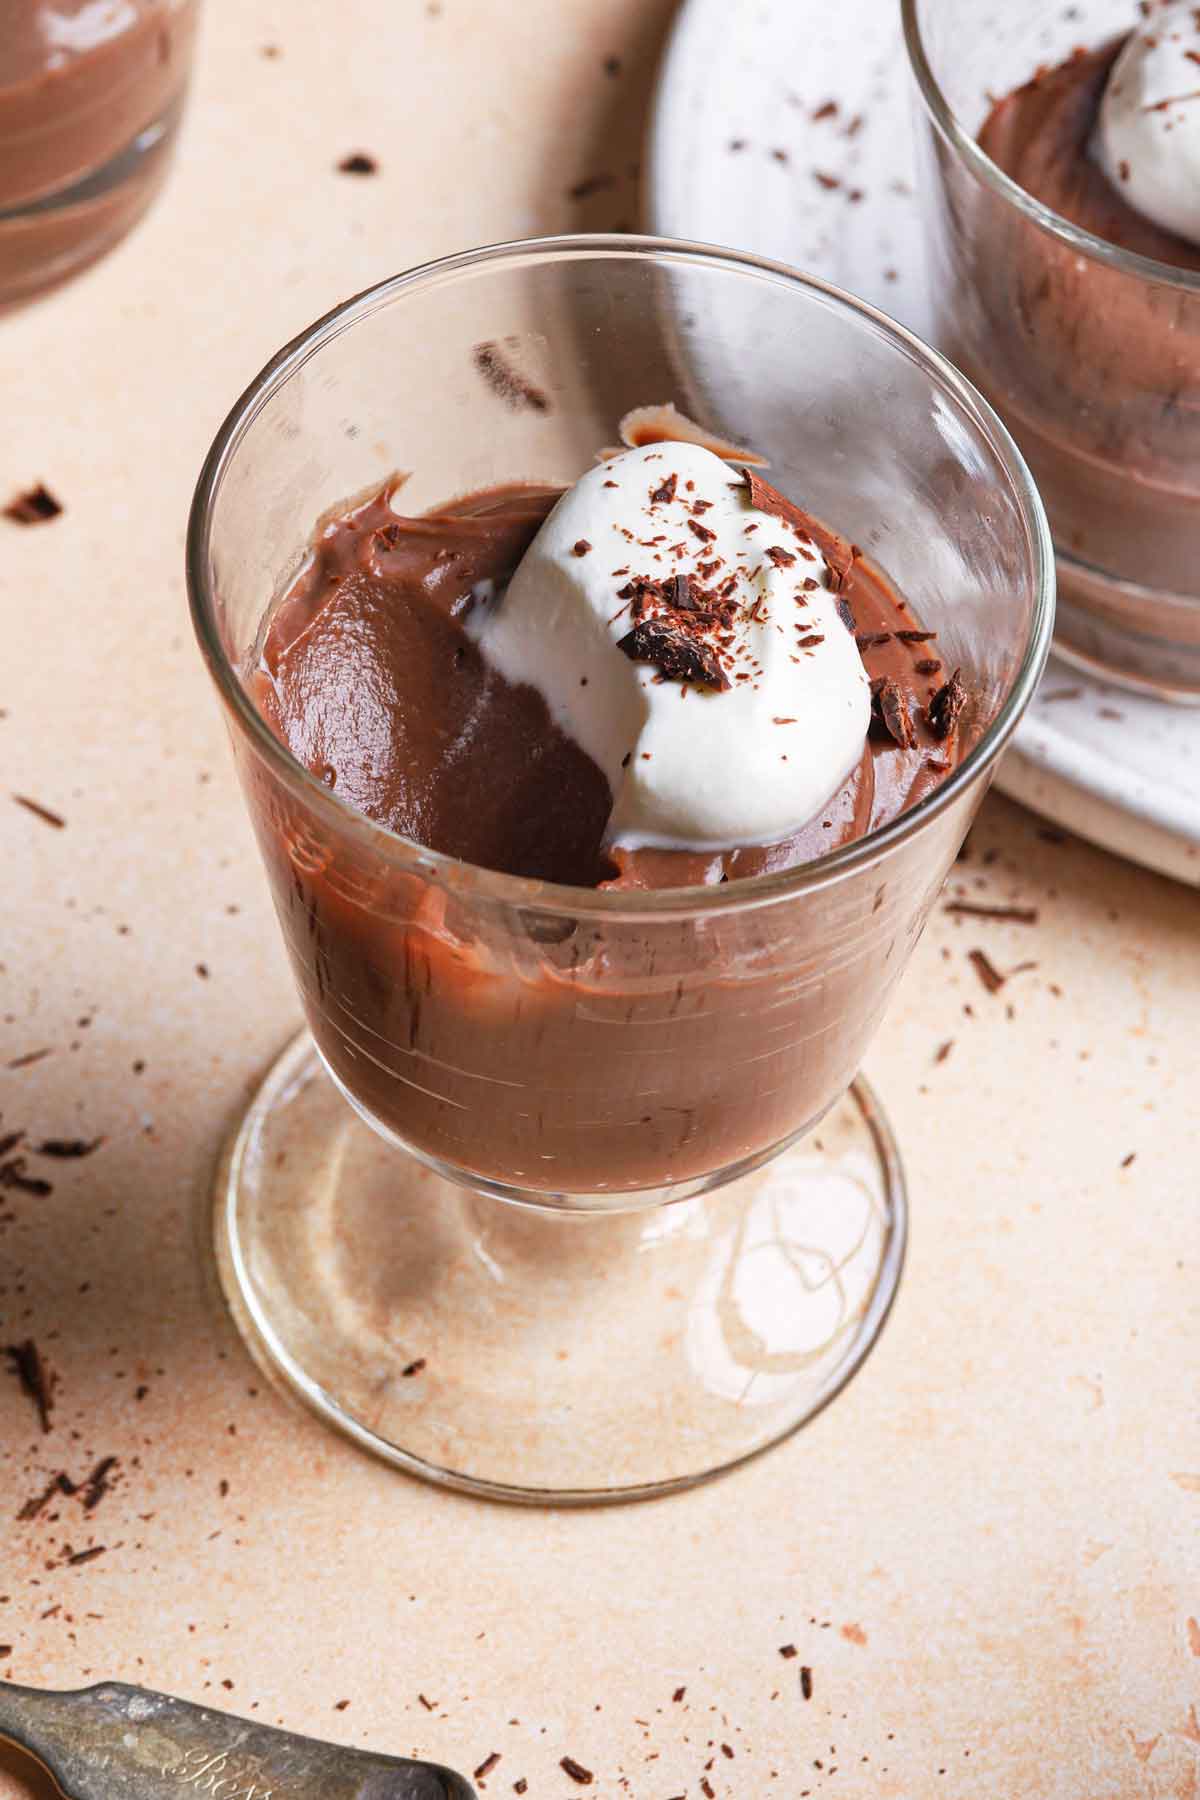
Step #3: Chill! – Pour the pudding into a bowl (or individual serving cups or ramekins) and press a piece of plastic wrap against the surface of the pudding to prevent a skin from forming. Refrigerate at least 4 hours or overnight before serving.

Topping Ideas
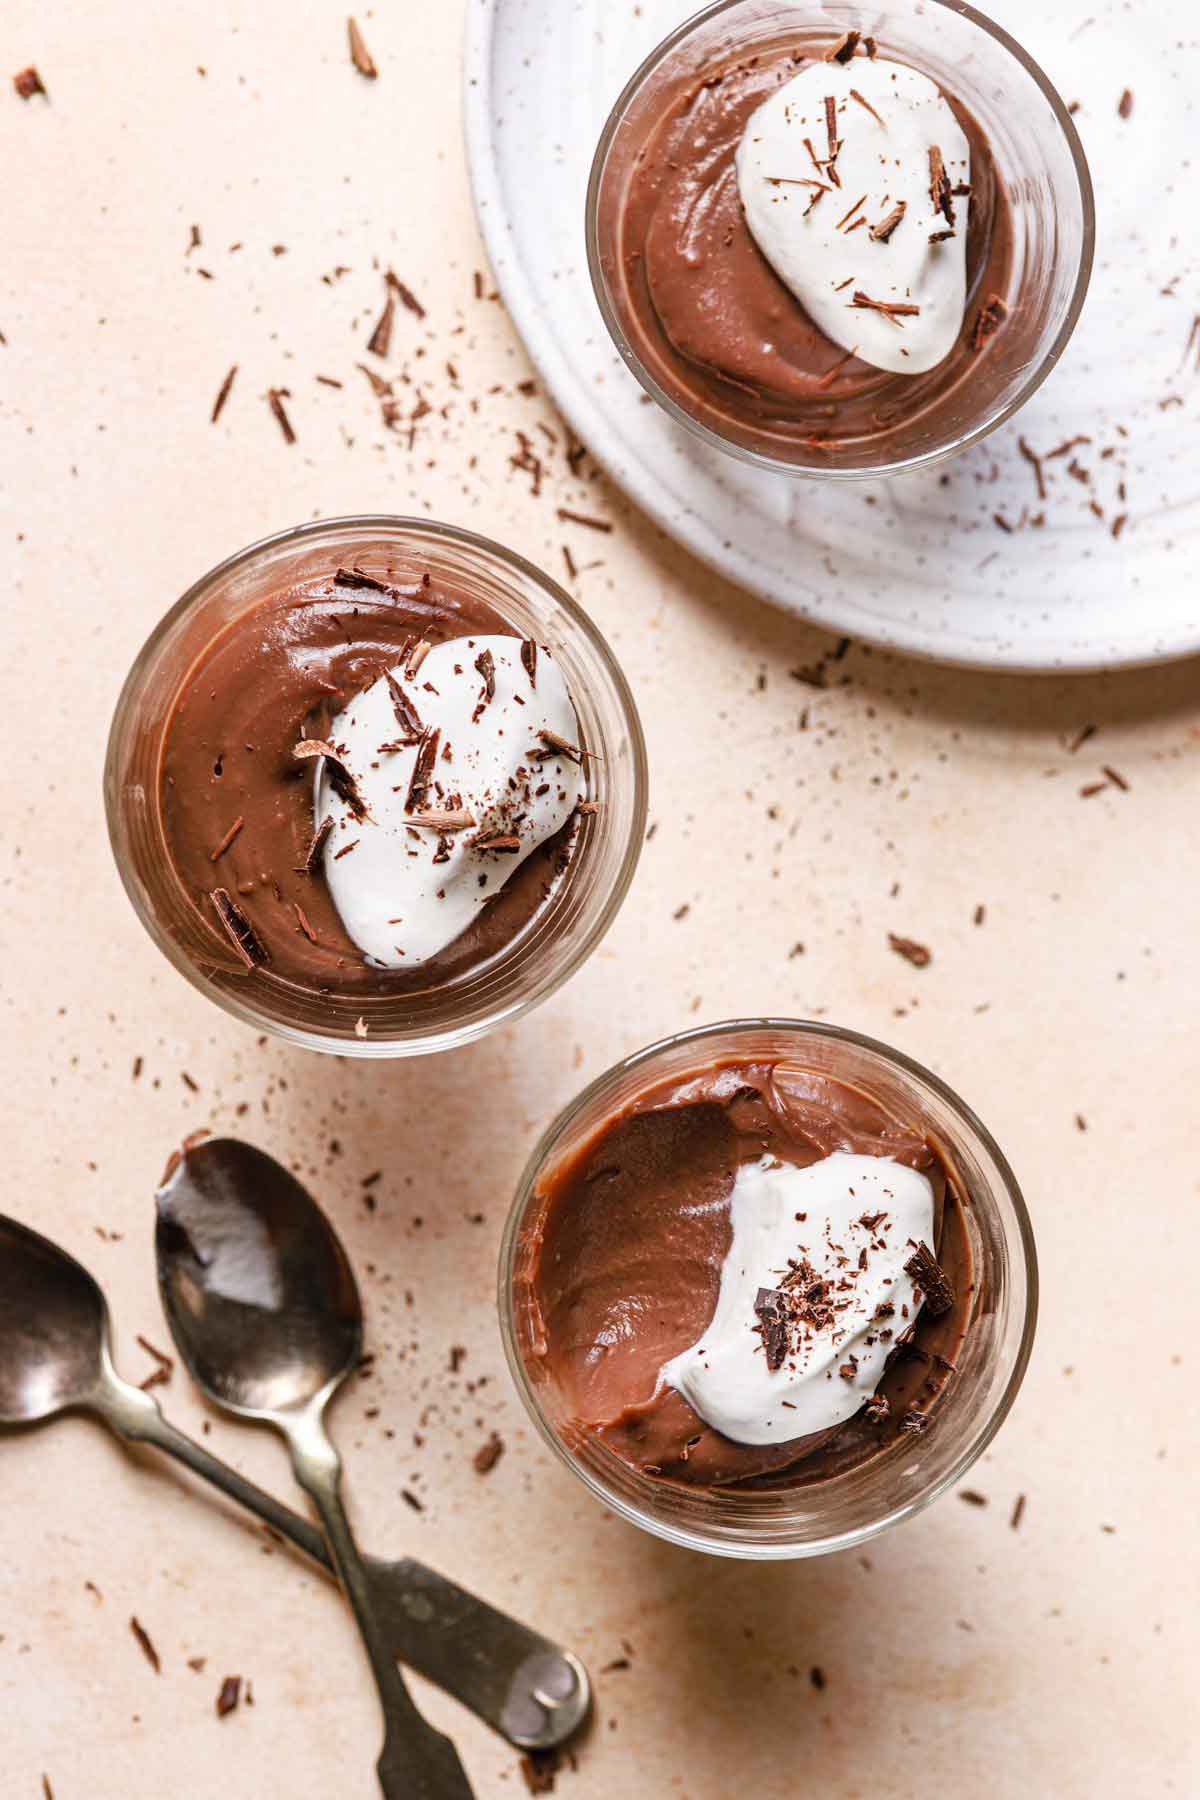
While I could dive right into a bowl of this creamy chocolate pudding on its own, here are a few different ways you can serve this pudding:
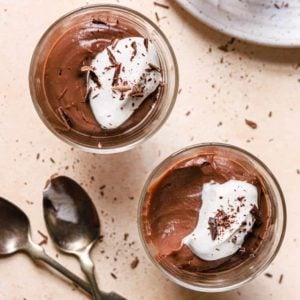
- Top with homemade whipped cream
- Garnish with chocolate or rainbow sprinkles
- Serve with crushed Oreos or make into a Dirt Dessert
- Top with sliced strawberries or fresh raspberries
- Shave milk, white, or dark chocolate on top
Can You Make Chocolate Pudding Ahead of Time?
Yes! Pudding is such a phenomenal make-ahead dessert because it HAS to chill for a number of hours to set up properly.
You can prepare it the morning you plan to serve it, or even the day before. Just be sure to press plastic wrap against the surface and keep it chilled until you’re ready to serve.
Storage Instructions
Once the pudding has been thoroughly chilled, it can be kept, covered in an airtight container, for up to 4 days.
I do not recommend freezing this pudding recipe, as the taste and texture will change considerably once thawed.
Recipe Notes & Tips
- For a Sweeter Pudding: Without adding additional sugar, you can make your pudding sweeter by using semisweet chocolate instead of bittersweet.
- For a Less Sweet Pudding: If you want a less sweet pudding, add cocoa powder to the pudding to add a bitter chocolate flavor that balances out the sweetness. Or you can slightly reduce the amount of sugar.
- Dairy-Free Option: While I have not tested it myself, others have noted that this can be made successfully with oat milk, almond milk, or coconut milk.
- How to Prevent a Skin During Cooling: To keep your chocolate pudding, or truly any pudding for that matter, from forming a skin while it cools, place a layer of plastic wrap directly on top of the surface of the pudding while it cools. This will prevent air from hovering above the pudding and making a thin film along the top.
- How to Thicken a Runny Pudding: The best way to thicken your chocolate pudding is with a corn starch slurry. Start by mixing together 1 tablespoons of cornstarch with 1 tablespoon of water to form a paste, then whisk it into the pudding mixture to thicken. Keep in mind that the pudding will continue to thicken as it cools and chills.
- How to Make Pudding Without Cornstarch: If you want to make this pudding recipe without cornstarch, you can substitute arrowroot powder with a simple one-to-one conversion.
More Delicious Pudding Recipes:
- Traditional Southern Banana Pudding
- Grandma’s Banana Pudding
- Rice Pudding Recipe
- Best Butterscotch Pudding
- Dark Chocolate Mousse
If you make this chocolate pudding recipe and love it, remember to stop back and give it a 5-star rating – it helps others find the recipe! ❤️️
Chocolate Pudding
Ingredients
- 2 cups (488 ml) whole milk or half-and-half, divided
- ½ cup (100 g) granulated sugar
- 2 ounces (56.7 g) bittersweet chocolate, finely chopped
- Pinch of salt
- 3 tablespoons cornstarch
- 1 teaspoon vanilla extract
Instructions
- In a medium saucepan, stir together 1¾ cups of the milk, the sugar, chocolate and salt, and place over medium-low heat. Cook, stirring occasionally, until the chocolate is completely melted.
- In a small bowl, whisk together the remaining ¼ cup milk and cornstarch until no lumps remain. Pour the cornstarch mixture into the saucepan and whisk to combine. Cook, stirring frequently, until the mixture thickens and begins to boil. Reduce the heat to low and continue to cook for an additional minute, whisking constantly. Remove from the heat and whisk in the vanilla extract.
- Pour the pudding mixture into a clean bowl (or individual serving cups or ramekins), and press a piece of plastic wrap against the surface of the pudding to prevent a skin from forming. Refrigerate the pudding until completely chilled, at least 4 hours. Whisk prior to serving, if storing in a large bowl. The pudding can be kept in the refrigerator, covered, for up to 4 days.
Notes
- Storing: Once the chocolate pudding cools, you do not need to keep the plastic wrap on the top layer of the pudding. Simply store in an airtight container in the refrigerator.
- Shelf Life: Stored properly in the refrigerator, this homemade pudding should last up to 4 days.
- Freezing: I would not recommend freezing and re-thawing this pudding recipe. Alternatively, you can freeze this pudding in a popsicle mold for a delicious Chocolate Pudding Pop!
Did you make this recipe?
Leave a review below, then snap a picture and tag @thebrowneyedbaker on Instagram so I can see it!
This recipe was originally published in February 2014.
Photography by Dee Frances


I have always understood that these types of set dairy desserts have different names based on the thickener used (at least in American English):
Eggs/egg yolks = custard
Cornstarch = pudding
Gelatin = panna cotta
Rennet = junket
Recette simple et facile à réussir,le goût du chocolat une fois refroidies est délicieux et ce conserve très bien servir avec fraise et crème fouetter très bon solange
The pudding was outstanding. However, as I was melting the chocolate with the sugar and milk, the mixture did not appear to be chocolately enough with just two squares of chocolate, so I added two more squares. This came together so easily. It will be my go to when I am wanting a rich. creamy, dessert. Thank you.
The taste is fantastic but there’s a chalky texture I put down to the cornstarch. Will not use again.
I love chocolate pudding and just happened to have a couple of squares or premium bittersweet chocolate in my pantry. I used some heavy whipping cream mixed into whole milk and used my homemade rum based vanilla. So delicious! Thank you for another delicious recipe!
5 stars!
I made this recipe tonight after trying one using flour. This recipe came together effortlessly and the texture was perfect! I used semi sweet chocolate w 1/4 c sugar. It was plenty sweet. Might try adding cocoa powder if I use semi-sweet again. Thank you!
OMG, delicious & easy to make!! A huge hit!!! Glad I doubled the recipe because everyone wanted more!!
I just made this. The smooth texture is wonderful, but I was expecting a richer flavour. In variations, you mention adding cocoa powder. How much would you recommend?
Hi Rita, I would start with 3 to 4 tablespoons and go from there!
Can this be made with a non-dairy beverage such as rice or almond milk
Can you use flour instead of cornstarch. I am allergic to corn products
Flour would be much harder to use – you need to pre-cook the flour to get rid of the cereal taste, and flour starches need a much higher temperature to activate than cornstarch. You might do better with a recipe specifically tested to use flour, or make a custard instead.
I love this recipe, made it several times. I’m wanting to substitute white chocolate so i can layer white and dark chocolate pudding. Do you have any recommendations on adjusting this recipe for white chocolate? Reduce the sugar? thanks!
Hi Amanda, I haven’t done a white chocolate version, but I would definitely reduce the sugar, as white chocolate is so much sweeter. Definitely let me know how it turns out!
Thanks for the recipe. I made it using Baker’s semi-sweet as that is what I had on hand. It turned out a touch sweet, but overall very good!
I Make Everything From Scrach!!! THAT way I Know What I Am Eating !!!! I Use Coco For My Pudding !!!! Kids Love It Thanks Ms Pat
One of the first foods I ever “cooked” was chocolate pudding. I was about 2 years old and it came from a packaged mix. Your recipe is the first time I made it from scratch and it’s sooooo much better! Thank you!
What an easy and delicious way to make chocolate pudding without all of the chemicals of a mix. My 5-year-old daughter loves “The Poky Little Puppy” and often requests that we make this ‘chocolate custard’. We just enjoyed it again tonight – with whipped cream and sprinkles, of course. :)
Can I use regular cocoa instead of bittersweet?
Hi Ruth, I would not recommend substituting cocoa powder for actual chopped chocolate.
I made 1/4 of this recipe last night using unsweetened baking chocolate and no adjustment to the sugar and it was so easy, quick and delicious! I had a sore throat and it was very nice comfort food – I just ate it warm out of the pot
The first time I tried making chocolate pudding from scratch, I though that I could simply modify the vanilla pastry cream from your banana pudding. It didn’t set either. I wonder if there’s a reaction between the chocolate and the egg that causes it? I can’t wait to try this one.
Can this be frozen and thawed?
Hi Cynthia, I’ve never tried freezing and thawing finished pudding; I’m not sure how the texture would turn out.
This is a lot like the recipe my Grandmother made for us. She would also serve it warm to us over fresh homemade biscuits. Best childhood treat ever! I know she used cornstarch, and probably cocoa instead of bittersweet chocolate. Her biscuits also contained lard, which I don’t use. Your recipe would make this more suited to my adult palate, but would love some over her biscuits.
Sorry if this has been asked before, but can I use this pudding recipe for chocolate cream pie filling? Do you think it will be firm enough..or how can I make it more firm? Thanks!
Hi Alyse, I have never tried to use this for a chocolate cream pie, but I do have a chocolate cream pie recipe if you’re interested: https://www.browneyedbaker.com/chocolate-cream-pie-recipe/
Do you think I could use agave in place of the sugar?
Hi Desiree, Unfortunately, that will not work – it will compromise the texture of the pudding.
I just made this, using Baker’s unsweetened and added about a tablespoon of instant coffee. So dark and yummy! Can’t wait to try it out with my “good” chocolate!
Your CCC would definitely like it in my house, I make pudding all the time and this is a cooked pudding. I’ve come to the point I don’t care for cold refrigerated pudding at all. Now many evenings, especially in the winter, I just grab a box of Jell-O Brand Cook and Serve pudding just for convenience, but my great-grandparents always made homemade pudding. Funny though, they never called it pudding, they always called it “cornstarch” and for YEARS as a kid it never clicked in my head that their “cornstarch” and pudding were the same thing. Finally, DING! one day the bell finally rang and it hit me, cornstarch IS pudding. All I know though is that I could just grab and plant a big kiss on the person who created cornstarch, that is, the white stuff in the box. As someone who has been diagnosed with Celiac disease and has to eat gluten free now in life, we GF people turn to cornstarch ALL the time as a thickener instead of flour and for many other uses in cooking and baking. It literally has been a lifesaver for me.
I just made this, but I used 1 3/4 cup evaporated milk (I MUCH prefer it, everything has a richer taste), and then 1/4 half-n-half to mix with the cornstarch. And I used semi-sweet chocolate, so I lessened the sugar down to 1/3 cup. It thickened VERY quickly. Gonna have it for dessert tonight, topped with my homemade whipped cream. If it tastes anything like licking the whisk clean, it’s going to be AMAZING!
I just made this pudding for the 2nd time in 2 days. I made it for guests last night, and for ourselves tonight!
I love that the ingredients are simple ingredients that I had in my cupboard, and didn’t contained processed products like Cool Whip or a boxed pudding mix. I will definitely be making this again, both for entertaining, and for an everyday weeknight dessert.
Thank you!
Chocolate pudding is comfort food, and my favorite part is the skin! So no plastic wrap on it for me, please
Azalea, you are not the only one who loves the ‘skin’. My question is how can we encourage a second skin to form?
I made this over the weekend for a dinner party and was delighted with the results. I doubled the quantity to make 6 adult portions and two little ones (for my little chef assistants). I added the whipped cream and some chocolate shavings for effect and it really did look (and taste) luxurious without being too heavy. The guests loved it and I still can not believe it only took 10 minutes to prepare!
Thank you BEB!
I agree with Patty, our experiences were the same on the quantity…3 of us, quantity sufficed but we were begging for more! I would not have had enough for 4 servings. So next time I will double the recipe. I do want to say that the pudding was very delicious…I had never tried homemade before…so easy and so much fun! Perfect for an after dinner chocolate fix! Thanks BEB!
I just made this recipe, and it turned out perfectly. I used Baker’s chocolate because that’s what I had on hand, and we all thought it was yummy. Next time, I will double the recipe. I divided it among the three of us, and it sufficed, but I would have liked a little more. I really don’t think it makes enough for four people. Thanks for this simple recipe!
Great recipe, thank you. How did you get the pudding to look so smooth in the glasses? I had to spoon mine into parfait glasses and even though I strained it, it formed a skin fairly quickly, and it was very thick. So, for guests, how do I get it in the glasses and looking like yours in the picture?
Hi Diana, I had the glasses ready and poured the pudding in immediately after removing it from the stove. You could try cooking for a minute or so less if it’s too thick for you.
Homemade chocolate pudding is the absolute best. There’s absolutely nothing like it. It makes me feel old-fashioned. I want to move to a farm house.
This was the most amazing pudding! It was so light and fluffy – we are never going back to homemade. However, we made two changes: doubled the chocolate and used almond milk. I was afraid it wouldn’t set but it did! Thanks for a new take on our home’s favorite!
Dying to make this!
This is probably a dumb question, but doesn’t the top of the pudding get messed up when you peel the plastic wrap off?
And can I use semisweet chocolate chips instead of bar (baking) chocolate?
Hi Lauren, Just a tad, but if you are making a big bowl, I would whisk before serving anyway. If the pudding is in individual serving bowls, it doesn’t make that much of a mess. If you’re worried about absolute pristine serving aesthetics, I would just put a dollop of whipped cream on top to cover up any air bubbles :)
Will definitely be making this pudding soon, looks delicious!
I had a sweet tooth, so I made the pudding. If it tastes anything like the remnants left in the pan, it is going to be AWESOME!!!! Just hate I have to wait 4 hrs.
I have to say…I just made this and it is – hands down – the best homemade chocolate pudding I’ve EVER made or tasted! Thank you SO much for doing all the hard work, so I can take all the credit in my house!
Hubby said thanks, he loved it!
~Ann
Veeeeery Yummyyy
For any diabetics and/or calorie watchers, I just made this using Splenda and 1% milk, and it came out very well for a low-sugar treat.. I’ve noticed that sometimes you need to add a bit more Splenda than sugar, and this was no exception. I used about 2/3 cup. Started out with the 1/2 cup, and it tasted a little light on the sweetness. Be sure to taste, as palates differ, and adjust as necessary. Great recipe for us diabetics!
I just made the pudding and can hardly wait for the chill time to end. I did lick the saucepan clean and it tastes fabulous! I’m so excited as the pudding recipes I’ve tried in the past have failed. Thanks for the continual fantastic recipes!
I am definitely pinning this pudding, looks perfect. My children will love it:)
Nothing is better than hot freshly made chocolate pudding over vanilla ice cream!
Nothing is better than homemade chocolate pudding! I have fond memories of whisking the pudding pot with my mother, standing on a chair. I’ve never tried using chocolate, but it might give a good texture. I’ve always used cocoa. This is mainly because my pudding recipe is my cocoa recipe, with some cornstarch whisked in!
This looks so rich and velvety! And it only takes 10 minutes to whip up before chilling time?! That’s amazing! Can’t wait to try this!
My mom’s recipe (that I know she’s been making for at least 55 years – lol!) takes 6 egg yolks and cocoa powder. Cocoa powder is still the chocolate form that is readily available to a non-computer using 89 yo in rural America. Anyway, she uses a double boiler and says you can over- stir the pudding (causes the cornstarch to break down?). Anyone of her 6 kids’ 13 grands, or 19 great-grands would climb mountains for her pudding, preferably with the “skin” on top! :)
it looks delish!
There is not many better treats than homemade pudding! This looks so thick and creamy. Love!
I would totally eat this pudding warm! On a cold day, have a warm dessert that is tasty!
I love homemade pudding! The recipe I grew up making with my mom uses cocoa powder, cornstarch, AND egg yolk. Delicious, rich, and thick!
I love frozen chocolate pudding, maybe I’ll have to try this and freeze it.
By the way you and Tracey of Tracey’s Culinary Adventures are my favorite food/baking bloggers, but I’m kinda worried she hasn’t posted on any social media since the beginning of January (like you she usually post a new recipe daily, so this is unusual). Do you have any idea what’s up?
Hi Linsey, I don’t actually, and have been worried myself. I tried to touch base with her via email and personal FB, but have not heard from her. I hope that everything is okay.
Michelle, did you ever hear from Tracey?
I have not :(
Thanks for replying – it’s so worrisome. I really miss her blog, which I LOVED, and I can’t fathom having a whole redesign of one’s blog and then just dropping off the face of the earth!
This was soo very yummy … can’t wait for my husband to try his secret treat tomorrow :) Thank you for such a wonderful & simple recipe.
Chocolate pudding is one of my favorite treats! This sounds great!
Reminds me of my childhood. I can’t wait to try this. Thanks for another awesome recipe!!
I’m not sure how or why, but I’ve never made homemade chocolate pudding! That’s a sad reality that I must change.
This sounds absolutely wonderful! I can’t wait to make this. It reminds me of the chocolate pudding my mom used to make when my siblings and I were kids. This was before instant, and I loved-loved-loved that thin layer of pudding on the surface! So no plastic wrap for me! I too am a Pittsburgh born and raised Slovak gal, and I appreciate all of the wonderful recipes, local ethnic traditions, and stories you pass on. My husband also loves your pictures of Einstein and Duke. Thanks for such a great website!
Yum! Chocolate pudding is a perfect snack for the sick.
Yum. Bookmarking this.
I, too, have made chocolate pudding soup. I think my daughter, esp. my younger, messier one, might have preferred it to the real thing! We have a fabulous picture of her face covered in the stuff. It was still yummy. :-)
If you like pudding, but are watching your calories and fat, Jell-0 makes a sugar-free, fat-free cook and serve pudding that is really good and only takes about 5minutes in the microwave. I can have 4 servings made (with skim milk) in less than 10 minutes, and it’s only 60 calories a serving – much better than the instant pudding (very artificial taste). The ingredients are all basic – except for the aspartame to make it sugar free.
You never fail to make me so hungry! Chocolate is the one thing I can never pass up (the reason why I have a whole category for it on my blog!) :)
xoxo Sarah Grace, Fresh Fit N Healthy.
Sorry to hear about the infection, but the pudding is definitely the silver lining! Homemade pudding is so much better than the boxed varieties — this looks delicious!
Jeni’s Spledid Ice Creams also use cornstarch as a thickener for the base rather than eggs and it comes out perfectly, so I’m not at all surprised that worked for you. Deeelish!
I’m trying this tonight. My youngest has diverticulitis and has frequent episodes…not fun. He also has a milk allergy so I’ll make it with almond milk for him, it won’t be as rich, but I hope it will be a treat since he misses a lot.
I had to chuckle at the thought of your CCC eating “one or two” cups of pudding a night. Now, there’s a man after my own heart! Sounds like your recipe makes two servings for him. :-) I’ve got two fabulous chocolate pudding recipes on my site which call for both eggs and cornstarch. I’m intrigued by your recipe which has just the cornstarch and will have to try it soon. I enjoy your blog and love your recipes!
Chocolate pudding is SO simple to make that it’s a shame NOT to make it from scratch. This is a good basic recipe – I like to use cocoa powder with the sugar and cornstarch mixture and then add a handful of semi-sweet or bitter-sweet chocolate chips to amp up the chocolate flavor after taking it off the heat to make it a “double” chocolate pudding. I put it in my “comfort food’ category and make it quite often during the winter. A teaspon of espresso powder is a nice addition as well. Thanks for the visual reminder!!
I love, absolutely love chocolate pudding. I cannot wait to give this a try. I’d love to see the recipe mentions using Cocoa…
Try as I might, I can’t help but prefer the taste of Jell-o boxed pudding over homemade. I’ve not been able to duplicate it and don’t know what that unique flavor is… maybe it’s the Tetrasodium Pyrophosphate. :(
Don’t feel bad about what you like! Here’s the deal with some foods – whatever Mom made is your favorite. If Mom’s chocolate chip cookies were Chips Ahoy, those are your favorites. If Mom’s pudding was Jell-O that’s your favorite. It doesn’t mean you can’t/don’t appreciate other versions, too! The recipes for your favorites have memories of your Mom and childhood in the ingredient list and can’t be beat!
That is so true! My mom used to serve us tuna salad made with Miracle Whip, and macaroni and cheese from a box. That is still my go-to comfort meal.
So funny that this showed up this morning, as I made pudding last night. My recipe varies a bit from yours, though. I use only abt 4 TB of sugar with a 3 cups of milk. Instead of bittersweet chocolate, mine has cocoa powder. When I found my recipe online, I was happy because everything it called for, I had! I don’t carry bittersweet chocolate, but I do always have cocoa powder on hand.
It’s hard to beat a great cup of chocolate pudding! Hope your consultant is recovering nicely :) Beautiful creamy chocolate pudding is the bomb!
I’ve been making homemade chocolate pudding for more than 45 years, it’s definitely a family favorite. My recipe differs in that it only uses 1/3 cup sugar but uses 2 1/4 cups milk(the 1/4 cup is used to mix with the cornstarch).
Hi Michelle,
This looks wonderful! I’m a big fan of homemade so my kids don’t eat all of that artificial gunk! If you’re ever looking to kick your pudding into decadent dessert check out Mels Kitchen Cafe recipe for Bittersweet Chocolate Pudding Pie. My husband loves it and I’ve been known to sneak bites between meals it’s so delicious! Have a great day!
Michelle,
What kind of chocolate did you use? Would Bakers brand be good?
Hi Marcie, I have never used Baker’s chocolate, so I can’t speak to how it would taste in here. I used Valrhona 72% bittersweet; my favorite chocolate that you can usually find in the grocery store is Ghiradelli (the baking bars found in the baking aisle).
Michelle,
I made this for VDay for my husband. It turned out so good! I found a Ghiradelli 70% extra bittersweet bar at Wally World. My mom is asking if you have done a vanilla pudding? I know you already have the instant DIY you’ve done.
Hi Marcie, I’m so glad you enjoyed it! I haven’t done a vanilla pudding yet, but it is on my list :)
Just a note of caution- a lot of time when people talk about “Bakers” chocolate they are referring to unsweetened chocolate. Bakers brand also makes regular chocolate, but it does not have the reputation for quality or flavor that Valrhona or Ghiradelli does. Whatever chocolate you use, I’d just be sure not to use the unsweetened stuff because the amount of sugar BEB recommends you use is based on the chocolate already having some sugar in it.
Wow, this really is simple! I love chocolate pudding, so I will be making this one soon :D
Do you think this would work with skim milk? I try to watch the calories/fat where I can.
Thanks.
Hi Rene, I didn’t try it with skim milk, so I can’t give you a 100% guarantee. It might work, but it won’t be as rich tasting (probably a little more watered down). I would use 2% if you can – a better compromise.
I’m going to try this tonight :)
Love homemade pudding!
Interesting observation on old/cornstarch vs. new/custard. Any musings why… Trend? Or custard just seems richer thereby better? Any chance the initial custard try failed because of technique? Did you try more than once with the same result?
I have a cottage/small bakery business and one of the absolute, hands-down best-sellers, is a coconut cream pie with a cornstarch as the thickening ingredient. But there are eggs (yolks) as well. It’s an ATK recipe and it never, ever fails.
Just based on the ones that I read, it definitely seemed to be a distinct, old-school vs new-school way of doing things. Yeah, I’ve done the custard thing multiple times, and I’m not sure if the particular recipe I tried had too much liquid or what, but it definitely didn’t work. I’ve had success with many custards (ice cream, pastry cream, etc.), but this one just wasn’t happening. I have made that same coconut cream pie, and agree that it is fabulous!
Pudding looks scrumptious and I will be making this week! Love your blog! I can empathize with your CCC as I had a bout of diverticulitis 18 mos ago. Not fun.
You have made me very hungry. Nothing like pudding from scratch.
Lovely photos, as always! Great recipe, will give this one a try. :)
It looks so rich and thick and just perfect!
Michelle!! Thank you!! My little ones LOVE chocolate pudding and my tiny twin is allergic to eggs. You nailed this! They are in for a treat this week :)
mmmm I love pudding – it reminds me so much of childhood!